So, after you have either built up the Diff yourself or had a Gearbox Specialist build it you'll obviously want it back in your car asap!!!!!!!!!!
Keep the unit as clean as possible when re-fitting it into the axle.
Also have a brick ready to prop the diff up on under the car, to prevent any ingress of foreign material.
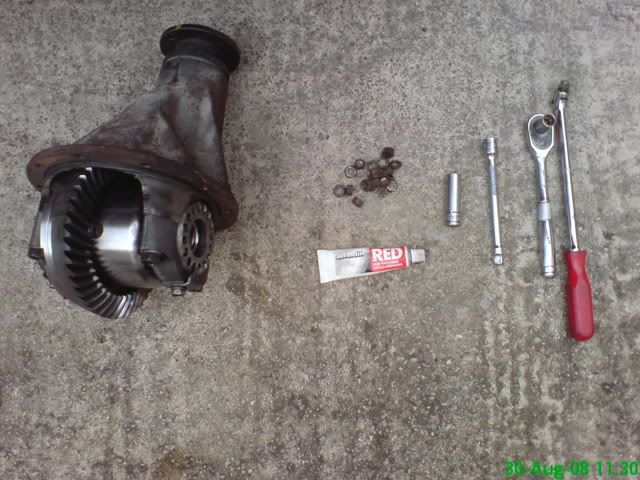
1#
Have the diff ready along with the 12mm nuts and spring washers. Also a suitable 12mm socket and rachet or lever bar. Use a quality sealant too, i use Hermatite red semi-hardening gasket compound.
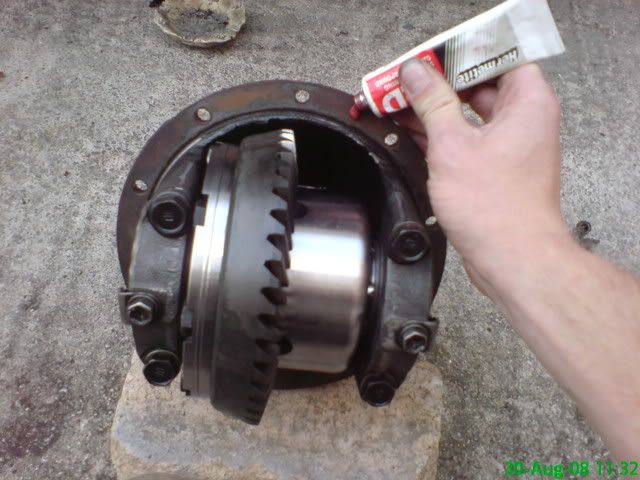
2#
Remove any trace of the original paper gasket from both the axle case and the differential mating surface. Ensure that the are completely oil free. Prop the diff up on a brick and apply a thin smear of the sealant:
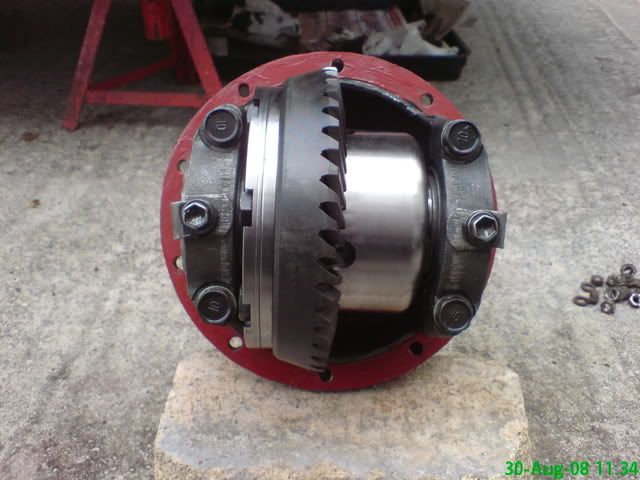
3#
Don't apply a second coat of sealant to the axle case, the amount on the diff will suffice. Again, be very careful to keep the diff unit absolutely spotless. You'll have to work quickly when the diff is ready to be fitted as we don't want the sealant to cure:
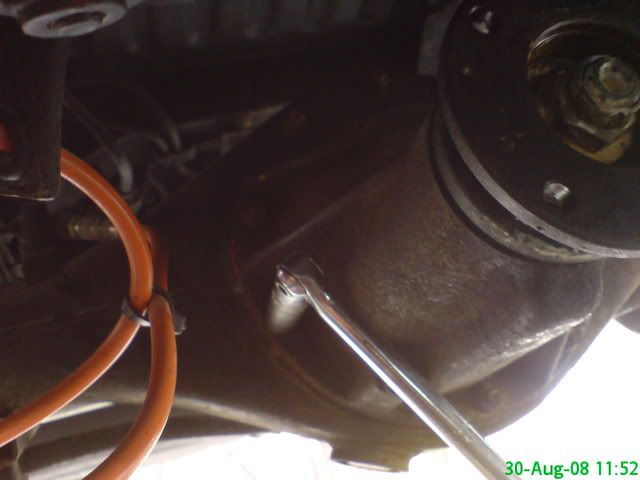
4#
Lift up the diff and slot it into the axle. Be careful not to snag it on the exhaust. When aligned in its correct orientation on the studs, slide it as far as it will go and gently tap with a plastic mallet until it is seated fully against the axle case:
5#
Carefully and evenly tighten all of the 12mm nuts that ring the differential case. Toyota do not specify a tightening torque for these nuts. Use your noddle and do them up tight but don't over do it! Also make sure the axle case drain bung is in place and tight too:
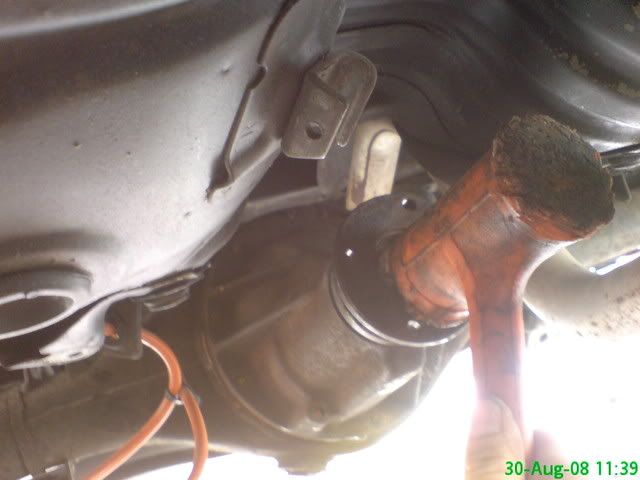
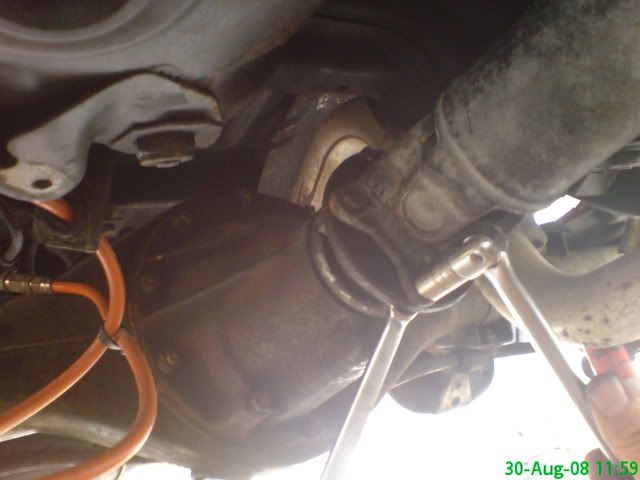
6#
Now re-fit the prop-shaft, making sure to align the match marks we made when removing it. Tighten up the 12mm nuts and bolts evenly. Make sure you put the spring washers under the nuts.
7#
Apply a thin film of the sealant to the end of the axle case and also the brake back plate:
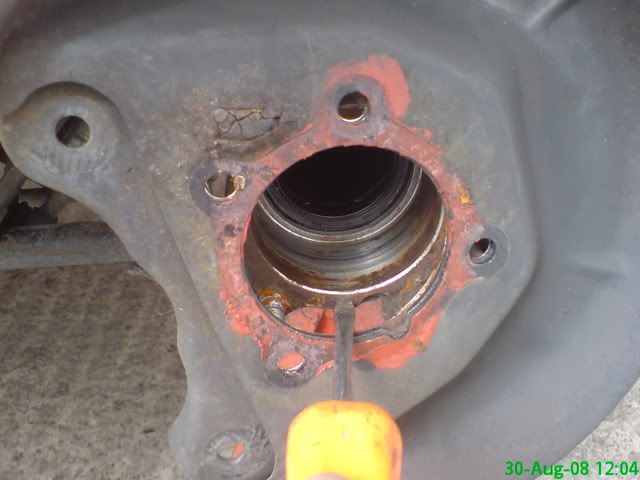
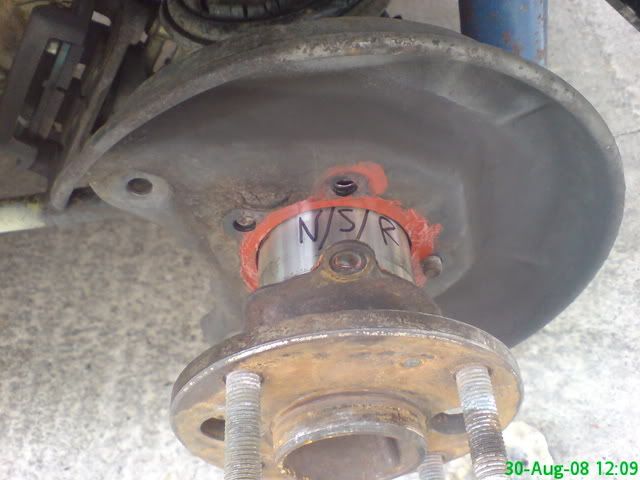
8#
Take the halfshaft and apply some gear oil to the splines. Make sure you have the correct shaft for that side of the car and slide it back into the axle case, beaing careful not to damage the seal. Rotate the bearing dust cover to the correct position:
[IMG]http://i253.photobucket.com/albums/hh64/FlewyAE86/DSC01481.jpg
[/IMG]
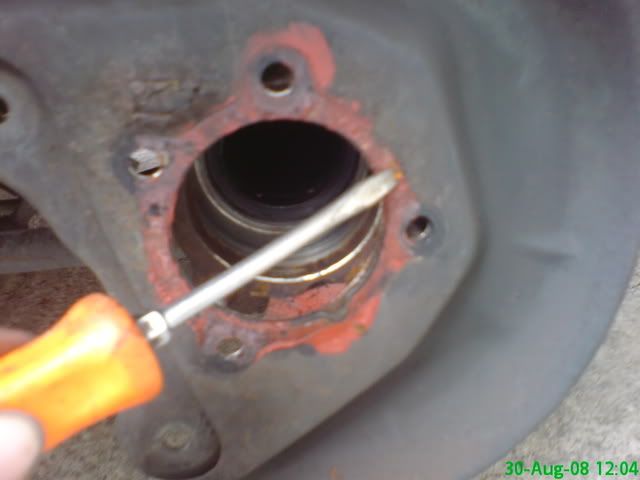
9#
Before driving the shaft fully into the axle case, gently hammer it in until you feel the splines locate. Rotate the hub to check it has started to go in. Some drag on the hub should prove this.
WHEN ALIGNED PROPERLY THE SHAFT WILL HAMMER IN SMOOTHLY WITH LITTLE RESISTANCE. DO NOT TRY TO FORCE IT!!!!!!!!!
Drift it fully home and line up the bearing dust cover with the studs:
10#
Tighten the 14mm nuts evenly and again, tight but not mental tight:
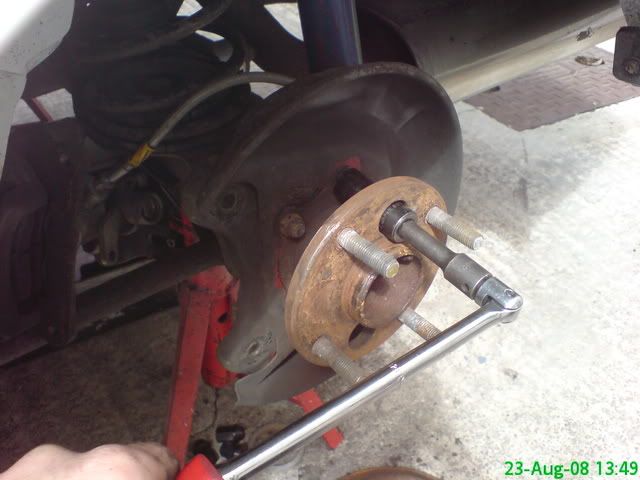
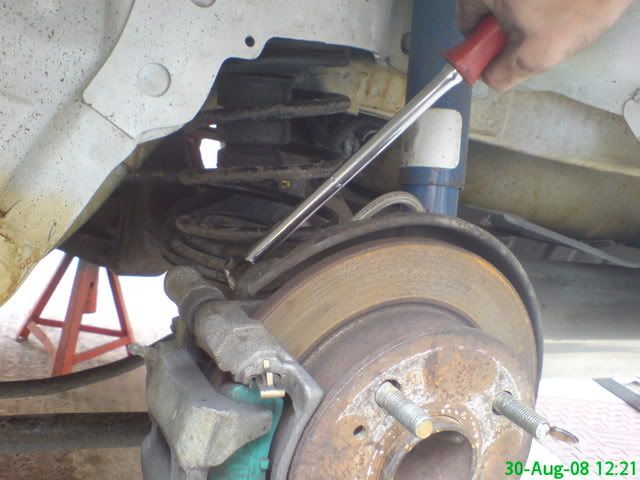
11#
Re-fit and tap home the brake discs to the side which they came from.
12#
Install the brake caliper. Apply high strength threadlocking compound to the 14mm bolts and tighten to 58 lb/ft.
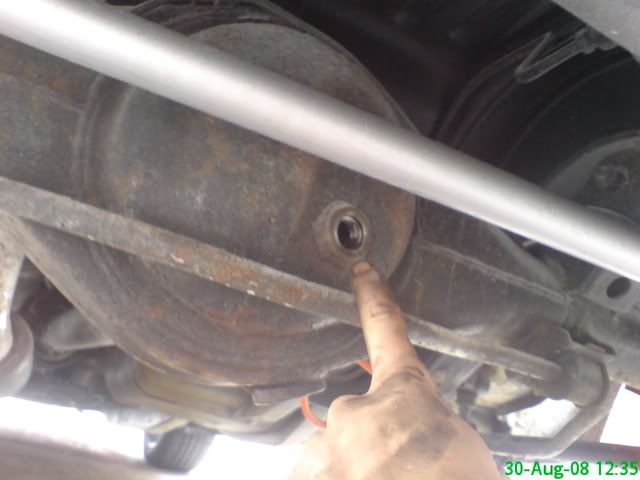
13#
Using a six-point 24mm deep socket and 1/2" breaker bar, undo the filler bung on the back of the axle case:
I used a pump i made from a cheapo tomato sauce pump action bottle and some clear tubing to get the oil back in:
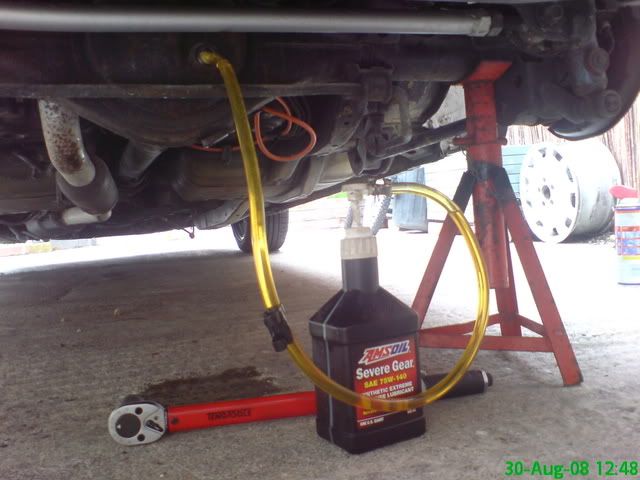
Saves dicking about with funnels and wasting oil!
Performance oils .co.uk sell a nearly identical kit for 15 odd quid.
James broke mine, so now i use the trusty ketchup pump!
Use the oil as specified by the differentials manufacturer, in my case The Kaaz Ep 80/90 Hypoid oil:

It takes just over a litre to fill the axle until the oil starts to run back out the filler bung hole. When it does, quickly install the bung and tighten it.
Refit and tighten your rear wheels!!!!!!!!!!!!!!!!!
14#
Take time to collect up all your tools and double check everything is tight and secure.
I ran my car in 1st gear while still on the stands to allow the oil to get all around the diff before using the car.
Let the car down off of the stands and hey-presto, you are ready to use break the diff in!
15#
Be sure to follow the break-in procedure that the diff manufacturer specifies.
I went to a quiet truck park and popped some cones down. Ask permission first! I didn't as there was no-one about!
In the case of the kaaz two way diff, this entails driving in a huge figure of eight and accelerating on the straights between the turns to 20 km/h.
When entering the tight turn, dip the clutch and coast round it, accelerating back upto 20km/h on the following straight.
Periodically raise the clutch briefly, mid corner.
Repeat the figure of eight for half an hour.
Take the car home again and using the jack and axle stands safely, drain the gear oil and refill with fresh manufacturer specified oil.
After this point the diff should be silent in operation unless very sharp corners i.e junctions are being negotiated. You'll hear some 'chatter' and also the inside rear wheel 'gripping' the road as you accelerate away.
ANY LOUD CLUNKING, KNOCKING, EXCESSIVE WHINING OR VIBRATIONS NEED TO BE INVESTIGATED IMMEDIATELY.
16#
After all of the above, you can pretty much get on with enjoying your new super sideways corolla!
Happy, safe motoring guys!!!!!
