1985 GT Apex Sprinter Trueno

Show us what you're spending your paycheque on

1985 GT Apex Sprinter Trueno

Postby Lauren » Mon Mar 31, 2014 7:46 pm

Here's some of my car in the final stages of being put back together.

I will add some earlier pics in due course!

Okay, we have the engine and box back in the car! It's been 20 odd months since it last sat in there!

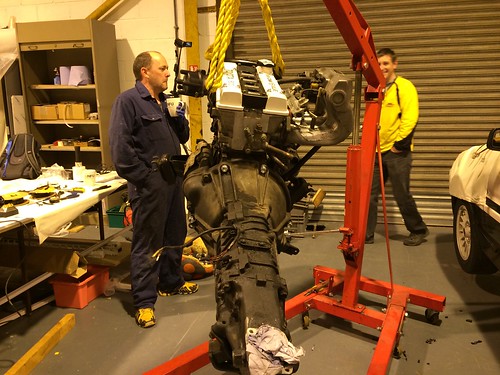
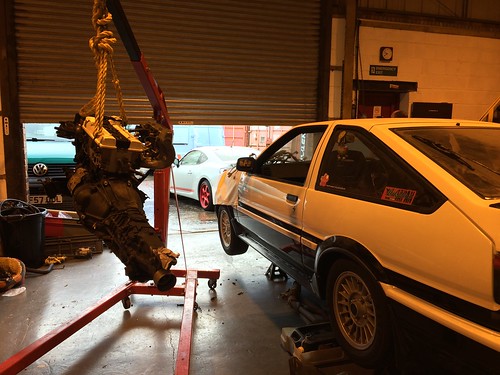
Waiting for the rain to stop so we can open the shutter doors and get the engine and box in position:
Image
Untitled by Lauren Blighton, on Flickr

Shutter going up and time for the AE86 to meet the GT86. :)
Image
Untitled by Lauren Blighton, on Flickr

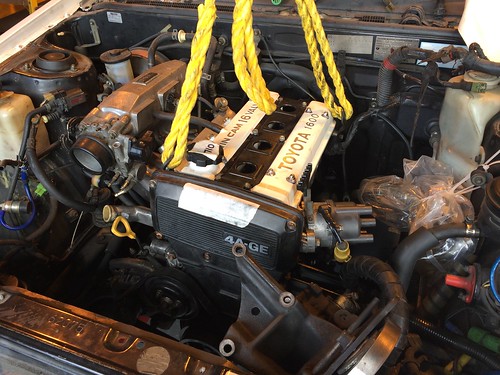
With three of us and me being underneath guiding the gearbox down, we had it all on the mounts within 15 minutes.
Image
Untitled by Lauren Blighton, on Flickr

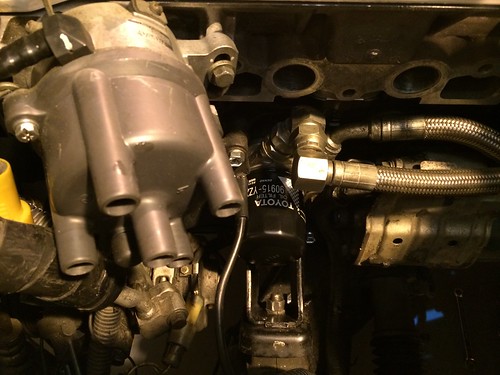
Mocal sandwich plate for the oil cooler on and new Toyota filter added:
Image
Untitled by Lauren Blighton, on Flickr

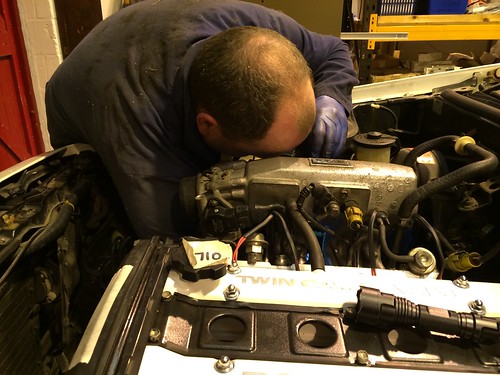
Si gets busy with all the awkward bits:
Image
Untitled by Lauren Blighton, on Flickr

This pic doesn't show much, but it signifies the prop being back on the gearbox, so all is connected underneath:

Image
Untitled by Lauren Blighton, on Flickr

Exhaust manifold needs some more wrapping yet:

Image
Untitled by Lauren Blighton, on Flickr

Si still fiddling:

Image
Untitled by Lauren Blighton, on Flickr

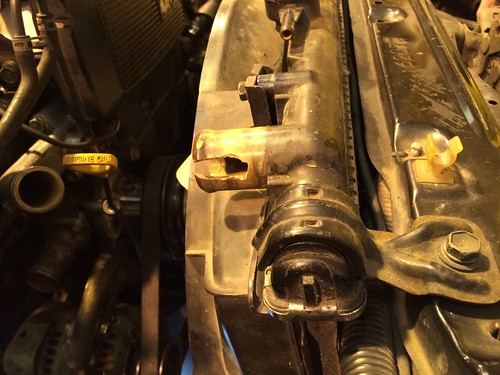
A bi of a problem here. The inlet seems to have got broken somewhow where it's been stored out of the car. :( Not sure what to do, will see if Toyota still have new ones and price up, I think. Not sure I can do much with that.
Image
Untitled by Lauren Blighton, on Flickr

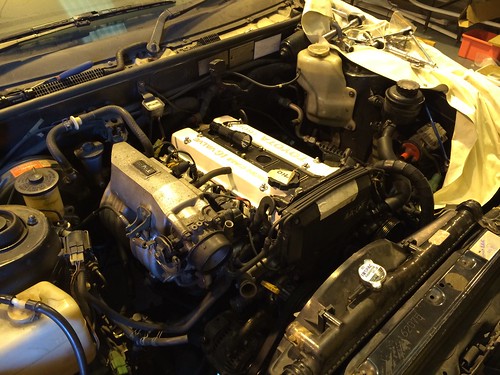
Still, a decent amount of progress has been made today. :)
Image
Untitled by Lauren Blighton, on Flickr

We need a few bits. Apart from the radiator, I need engine oil, gearbox oil and a few odds and sods. But, will hopefully have it running in a few weeks. :)

Got a bit more done today.

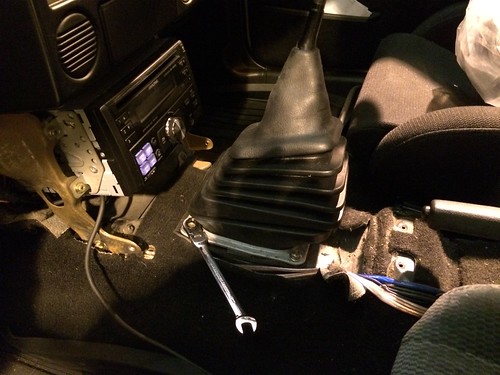
Filled the gear box oil which is the easiest job in the world on an AE86 as you just pour it through the hole where the gearlever sits. Then bolted up the gearstick and the surround:
Image

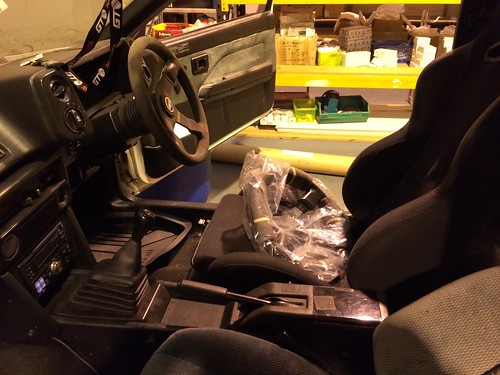
Now with gearstick and centre console back in place. Interior now complete if absolutely filthy from being in the workshop for the last 20 months:
Image

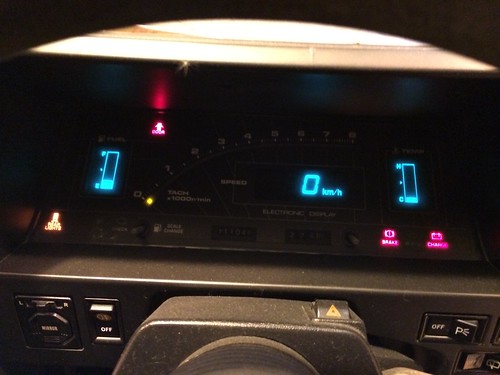
Connected the battery and voila:

Image

Although in this pick I'd forgot to push the alarm button so no ignition light. When I did, though it did turn over, just. This is not bad for a battery that's been sitting for so long!
Image

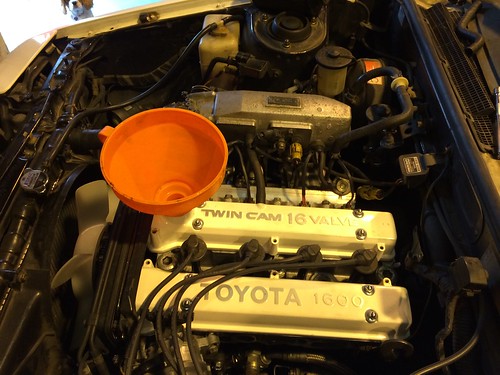
Everything is on except for the exhaust manifold which needs wrapping. I have some new studs coming from Toyota too.

In this pic I had just put the oil in;
Image
1985 AE86 GT Apex Sprinter Trueno. HKS cams, 2 way LSD, Tanabe exhaust, K&N, TRD suspenders.
2013 GT86, Milltek, decat, Injen induction, TE37s, TRD aero fins, TEIN Street Flex & EDFC Active Pro, mega sound system.
User avatar
Lauren
 
Posts: 77
Joined: Thu Mar 06, 2014 7:48 am

Re: 1985 GT Apex Sprinter Trueno

Postby Lauren » Mon Mar 31, 2014 7:50 pm

Here's my daily driver which I also use for sprinting and track days:


Image

It will be fitted with Tein Flex and EDFC Active Pro next month which ought to get it at about the right height.
1985 AE86 GT Apex Sprinter Trueno. HKS cams, 2 way LSD, Tanabe exhaust, K&N, TRD suspenders.
2013 GT86, Milltek, decat, Injen induction, TE37s, TRD aero fins, TEIN Street Flex & EDFC Active Pro, mega sound system.
User avatar
Lauren
 
Posts: 77
Joined: Thu Mar 06, 2014 7:48 am

Re: 1985 GT Apex Sprinter Trueno

Postby Lauren » Mon Mar 31, 2014 7:52 pm

Not quite in order, sorry:

Well progress seems to be slow. I seem to feel ill everytime I work on the car, it's just a bit too cold in the workshop at the moment.

We got the engine off the stand with the help of the engine crane. I put the clutch and pressure plate on, but then remembered, arrghh, MR2 crank, spigot bearing!

I'm glad I remembered as I wouldn't want to go through that again.

Here it is with the spigot bearing which the gearbox input shaft locates into:

Image
Untitled by Lauren Blighton, on Flickr

It does make it harder to get the gearbox on though.

Mark drills out the stripped thread on the bell housing:
Image
Untitled by Lauren Blighton, on Flickr

Then he taps it:
Image
Untitled by Lauren Blighton, on Flickr

Then helicoil in:
Image
Untitled by Lauren Blighton, on Flickr

Engine and gearbox reunited complete with new clutch.

Image
Untitled by Lauren Blighton, on Flickr

There are four bolts missing. Mark wasn't happy using whatever bolts were around so will have to order the right bolts from Toyota.

Next step is getting the engine and box in, not looking forward to that!

A bit more progress.

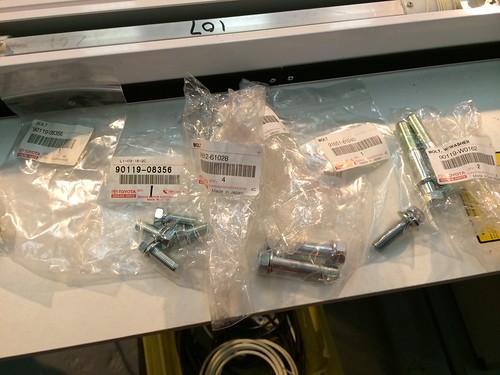
Mark insisted that I buy new bolts for the bellhousing to gearbox and block strengtheners. So off he went to Toyota:

Image
Untitled by Lauren Blighton, on Flickr

£25 for 8 bolts!

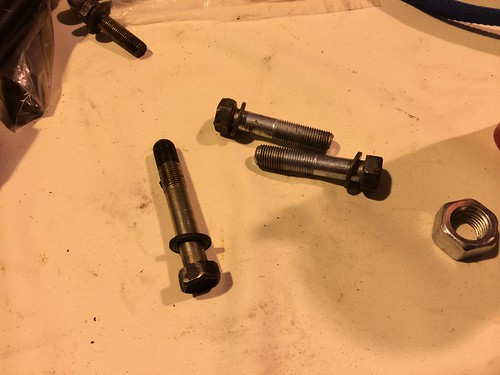
I'm glad we changed them though, the old ones were in terrible condition:

Image
Untitled by Lauren Blighton, on Flickr

Mark makes the first cut to the wiring loom in preparation for the new injector clips (we've changed to later injectors from an AW11):

Image
Untitled by Lauren Blighton, on Flickr

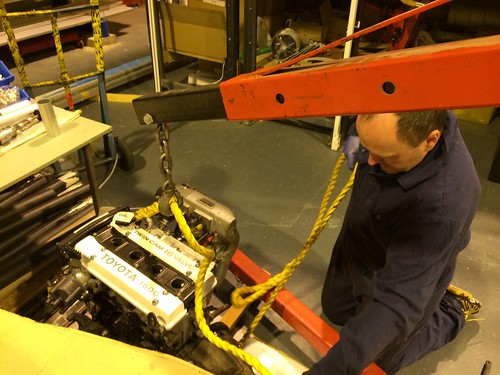
Meanwhile Si and I get the engine and box ready for lifting so we can get to those other bolts:

Image
Untitled by Lauren Blighton, on Flickr

Starter on and some shiny bolts too:

Image
Untitled by Lauren Blighton, on Flickr

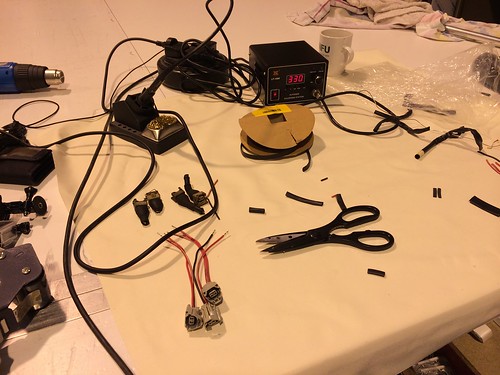
Mark's soldering setup. I know crimping would be better but we don't have the gear. They will be well soldered, knowing Mark:

Image
Untitled by Lauren Blighton, on Flickr

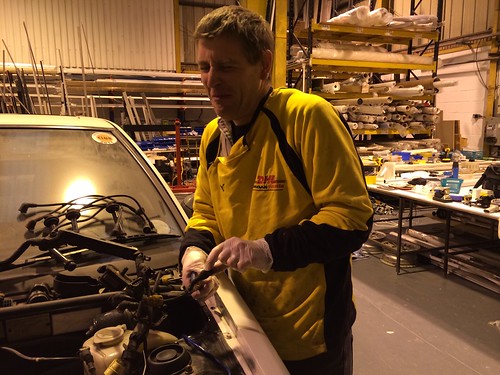
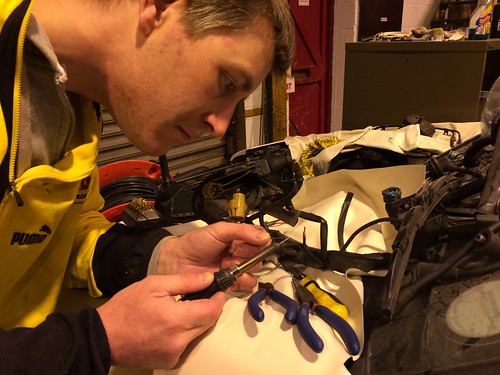
Mark, hard at work:

Image
Untitled by Lauren Blighton, on Flickr

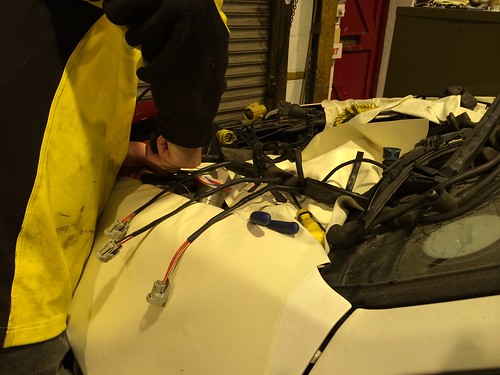
New injector plugs spliced into the old loom:

Image
Untitled by Lauren Blighton, on Flickr

Next the engine and box goes back in!
1985 AE86 GT Apex Sprinter Trueno. HKS cams, 2 way LSD, Tanabe exhaust, K&N, TRD suspenders.
2013 GT86, Milltek, decat, Injen induction, TE37s, TRD aero fins, TEIN Street Flex & EDFC Active Pro, mega sound system.
User avatar
Lauren
 
Posts: 77
Joined: Thu Mar 06, 2014 7:48 am

Re: 1985 GT Apex Sprinter Trueno

Postby Lauren » Mon Mar 31, 2014 7:54 pm

More great work from Tom:

Block has previously been cleaned and the exterior painted but now it's time to clean it properly externally and internally for rebuild.
Image

It's simply amazing how quickly rust forms. Thus was previously cleaned and sprayed with WD40 (obviously not thoroughly enough)
Image

Bottom face flatted and cleaned with ground flat gauge plate and 400 or 600 grit paper.
Image

Bottom face done
Image

Removing dowels. Drill is used to prevent dowel collapsing when gripped.
Image

Dowels removed ready for flatting off.
Image

Main gallery and main bearing gallery inspection.I ground a small square section of aluminium to have a 45 degree chamfer on the end. The torch will be at one end of the main oil gallery and the mirror stick passed through from the other end.
Image

This is what you see without the aluminium mirror. The main gallery is brightly lit but the walls of the port are too dark to inspect properly.
Image

With the aluminum "mirror" in place there is plenty of light illuminating the ports walls for inspection.
Image

Checking the port is completely clean.
Image

The plugs of the main oil gallery have been removed both ends so that the cleaning is open ended.
Image

Cleaning the main gallery.
Image

Main bearing uppers fitted.
Image

Plastigauge cut into sections for the main bearings.
Image

Plasitguage in place....
Image

.......and extruded....
Image

Measuring the clearance range.
Image

Taking up the endfloat one way.
Image

Put the thrust bearing in the right way!
Image

Lower thrust bearing.
Image

Torquing down
Image

Crankshaft end float (crank forced hard one way)
Image

Insert piston ring square in bore for ring gap measurement.
Image

Image

Measuring ring gap
Image

Cleaning pistons
Image

This hole is a cross drilling into the outer diameter of the gudgeon pin bore.
Image

1200 / 1500 / 2000 grit paper and a needle file, cleaning the piston ring grooves
Image

Final piston ring groove clean.
Image

Piston crown marked for positions of ring ends
Image

Piston assemblies under assembly.
Image

Fitting the first piston
Image

Make sure you don't spin the rings when fitting the compressor
Image

Piston held at correct height ready for piston ring compressor
Image

Big ends plastigauge in place.
Image

Big end nuts are tightened to 39Nm and then....
Image

..an additional 90 degrees. Marking the position prior to final 90 degree tightening.
Image

Mark will face each other when tight.
Image

Fully tightened down.
Image

Plastiguage check.
Image

Don't scratch the crank when removing Plastigauge. This is an aluminium scaper which I have removed all the sharp edges.
Image

Put to bed properly till the next time...
Image
1985 AE86 GT Apex Sprinter Trueno. HKS cams, 2 way LSD, Tanabe exhaust, K&N, TRD suspenders.
2013 GT86, Milltek, decat, Injen induction, TE37s, TRD aero fins, TEIN Street Flex & EDFC Active Pro, mega sound system.
User avatar
Lauren
 
Posts: 77
Joined: Thu Mar 06, 2014 7:48 am

Re: 1985 GT Apex Sprinter Trueno

Postby Lauren » Mon Mar 31, 2014 7:57 pm

Cylinder head! Tom's words and pics:

Mismatch between valve pocket valve seat
Image

Horrible lip with mismatch between pocket and seat
Image

Two or three rotary tools makes the job easier
Image

Inlet port blended seat to pocket
Image

Image

Image

Exhaust port
Image

Exhaust pitted valve seat
Image

Really need a bigger parts washer....
Image

Thermostat face
Image

Image

Need a bigger sink too!
Image

Image

Roughly cleaned parts awaiting final clean
Image

It takes quite a while to clean everything properly
Image

Parts washer has been retrofitted with a 500w pond heater, makes a big difference with water based degreasers
Image

All components cleaned and ready to go
Image

And the roughly cleaned cylinder head
Image

This is actually a degreased inlet valve. The valve stem seal has obviously failed on this particular valve
Image

This is what all the exhaust valves looked like
Image

All the ports are slightly mismatched
Image

Image

On the right is the modified inlet ports on Cylinder1. Cylinder 2 is yet to be done
Image

Image

Engineers Blue used to check seat
Image

Image

Midway through lapping. Some pitting remains, more lapping required
Image

Pocket casting imperfections
Image


Power tools can't be used for everything. The donkey work begins....
Image

Image

Image

Exhaust port original
Image

Exhaust port smoothed
Image

Exhaust ports done, pockets not done.
Image

Image

Detritus from hand sanding
Image

Image

Exhaust face. Note mismatch. This will not be corrected because the exhaust manifold will need changing at some point in the future
Image

Face cleaned
Image

Deburring the sharp edges. Top water gallery done, bottom yet to be done
Image

Tools required for deburring
Image

Facing the cylinder head face
Image

Rudimentary valve lathe
Image

Image

Image

he surface finish of a fully cleaned valve
Image

Image

This bar has been ground perfectly flat.
Image

Image

Image

Image

Image

Image

Image

Image

Image

Image

Image
1985 AE86 GT Apex Sprinter Trueno. HKS cams, 2 way LSD, Tanabe exhaust, K&N, TRD suspenders.
2013 GT86, Milltek, decat, Injen induction, TE37s, TRD aero fins, TEIN Street Flex & EDFC Active Pro, mega sound system.
User avatar
Lauren
 
Posts: 77
Joined: Thu Mar 06, 2014 7:48 am

Re: 1985 GT Apex Sprinter Trueno

Postby Chaycore » Mon Mar 31, 2014 9:43 pm

are you planning on having it dyno'd once run in? would be keen to see what sort of power it puts out as its better than it would have been when new!
User avatar
Chaycore
Site Admin
 
Posts: 98
Joined: Mon Jan 13, 2014 5:30 pm

Re: 1985 GT Apex Sprinter Trueno

Postby Lauren » Tue Apr 01, 2014 8:13 pm

I'm not too worried, Chay. Last time with a faulty injector (as we now know) it made 132bhp. Would guess at 140bhp but probably not more than that.

It's never going to be quick though! ;)

I could really use with finding some 15x7's for it, TE37s (to match the GT) or Watanabe, Hayashi Streets etc. I think running a 15" with 195/50's will help how the car feels on the road. It's got to be an improvement over the current balloon tyres!
1985 AE86 GT Apex Sprinter Trueno. HKS cams, 2 way LSD, Tanabe exhaust, K&N, TRD suspenders.
2013 GT86, Milltek, decat, Injen induction, TE37s, TRD aero fins, TEIN Street Flex & EDFC Active Pro, mega sound system.
User avatar
Lauren
 
Posts: 77
Joined: Thu Mar 06, 2014 7:48 am

Re: 1985 GT Apex Sprinter Trueno

Postby Kev » Wed Apr 02, 2014 5:18 pm

Looking good. When do you think it will be installed and running?

I might have some 7x15 SSR Mesh wheels kicking about.
1 x Sprinter Trueno
1 x Peugeot 205 B18C
User avatar
Kev
 
Posts: 87
Joined: Sat Feb 15, 2014 3:47 pm

Re: 1985 GT Apex Sprinter Trueno

Postby Lauren » Wed Apr 02, 2014 5:26 pm

Cheers, well, we hope to have it started for this Saturday. Just have the exhaust manifold to fit which is now wrapped and ready to go. :)

I may well be interested in the Mesh wheels, will have a think about it. I've got a very expensive month with the GT getting full TEIN coilovers and EDFC Active Pro being installed next week, so wheel budget might have to wait for a little while. Plus a trip to Japan to consider!

The car has been off the road for 20 months (August 2012) so has no MOT or anything. Not quite sure when I'll get it on the road, though as I don't really have any rush to do it at the moment.
1985 AE86 GT Apex Sprinter Trueno. HKS cams, 2 way LSD, Tanabe exhaust, K&N, TRD suspenders.
2013 GT86, Milltek, decat, Injen induction, TE37s, TRD aero fins, TEIN Street Flex & EDFC Active Pro, mega sound system.
User avatar
Lauren
 
Posts: 77
Joined: Thu Mar 06, 2014 7:48 am

Re: 1985 GT Apex Sprinter Trueno

Postby Guest » Thu Apr 03, 2014 4:11 pm

Thought you would have dumped that GZE in which you have kicking around?

Mark likes his detail doesn't he - very tidy looking build! Takes me back to when I rebuilt my 3sGTE!
Guest
 

Next

Return to Build Threads

Who is online

Users browsing this forum: No registered users and 25 guests